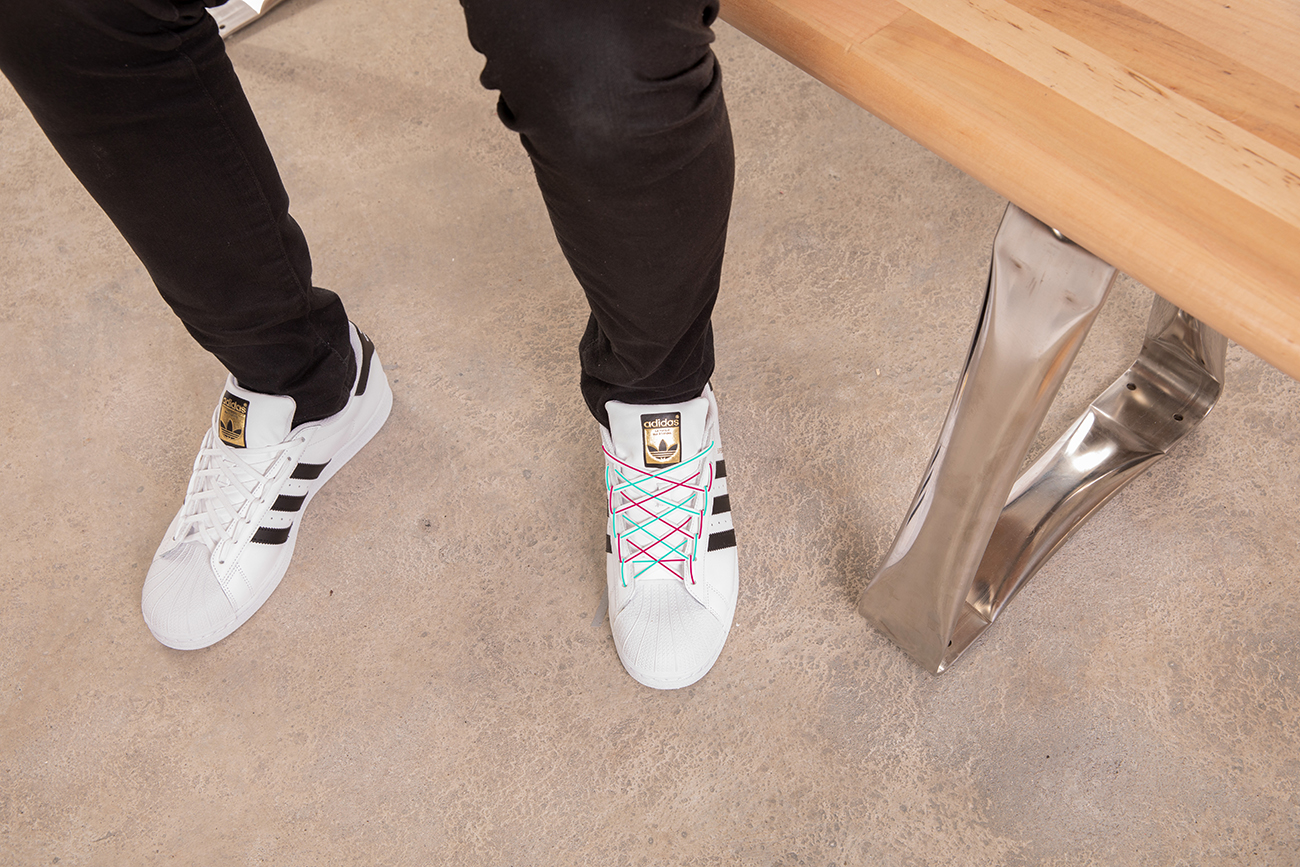
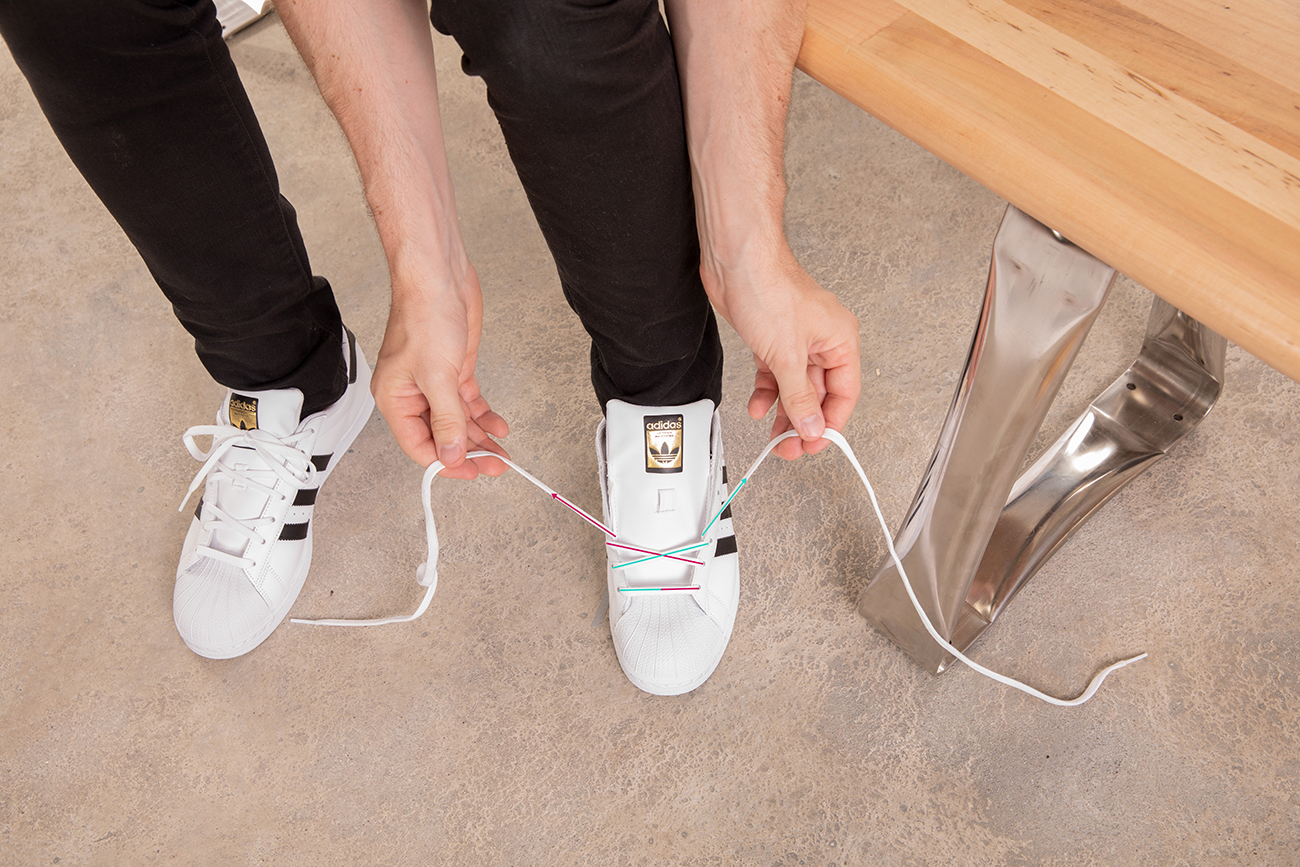
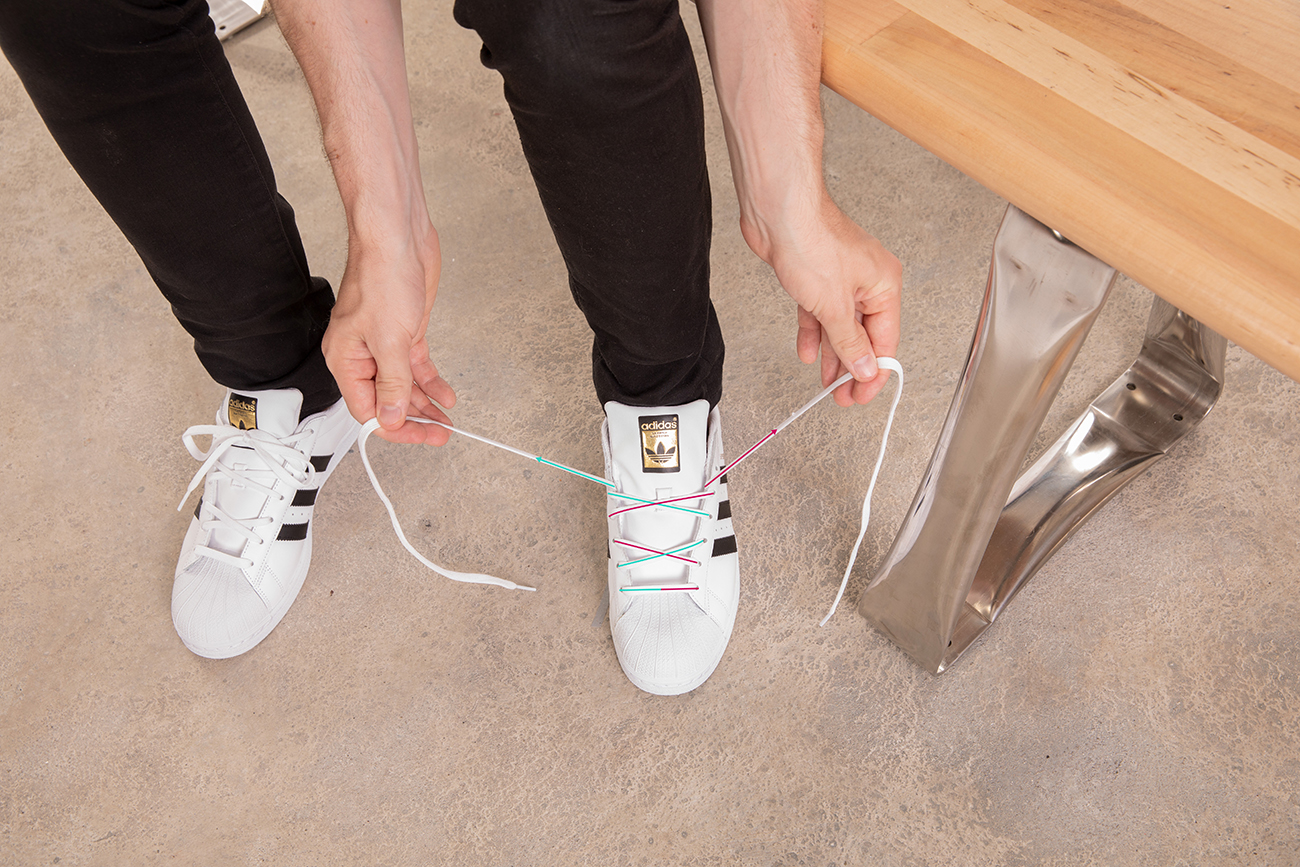
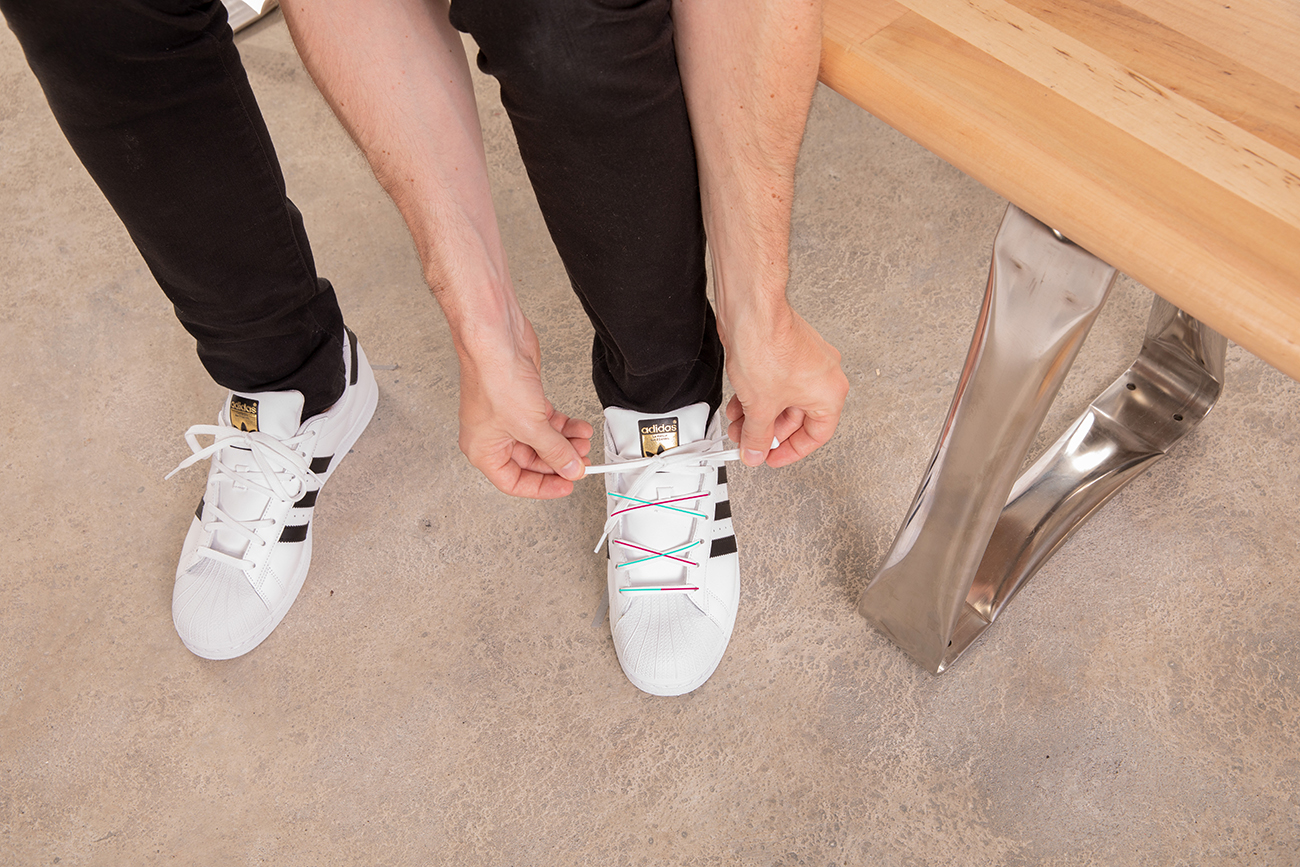
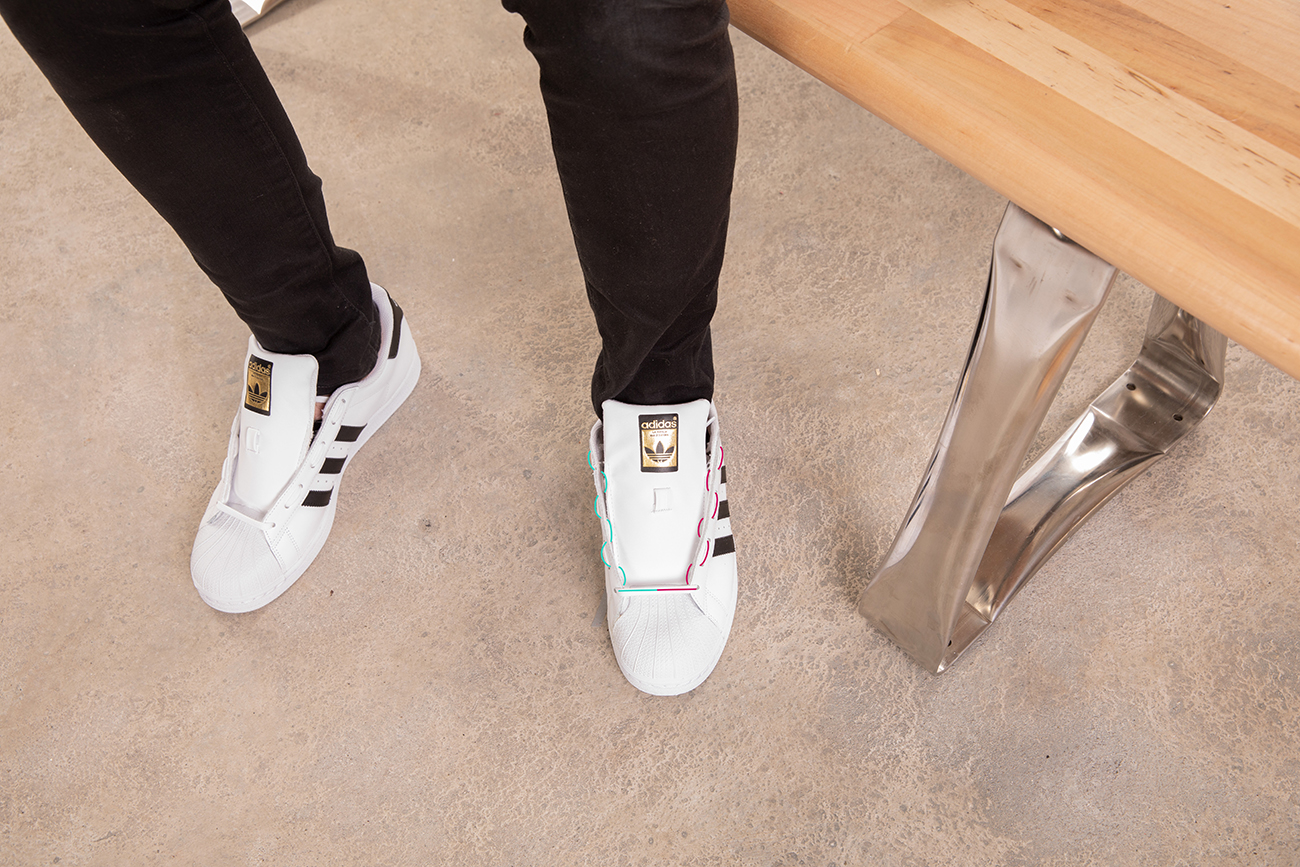
You gotta know how to lace sneakers by finding a style that fits you and your shoes. Take a moment before bringing those fresh kicks to the street so you’re looking good from head-to-toe. Each and every detail matters when you’re trying to dominate the streetstyle game. One way to step up your look is to make those laces pop.
Here you’ll find six creative ways to lace up your sneakers. Some offer a functional approach, some more stylish. But all of them offer a chance for you to express your individuality and creator spirit. Letting your shoes speak to your style wherever you’re headed.
LACING INSTRUCTIONS
When you’re learning how to lace sneakers, follow these steps:
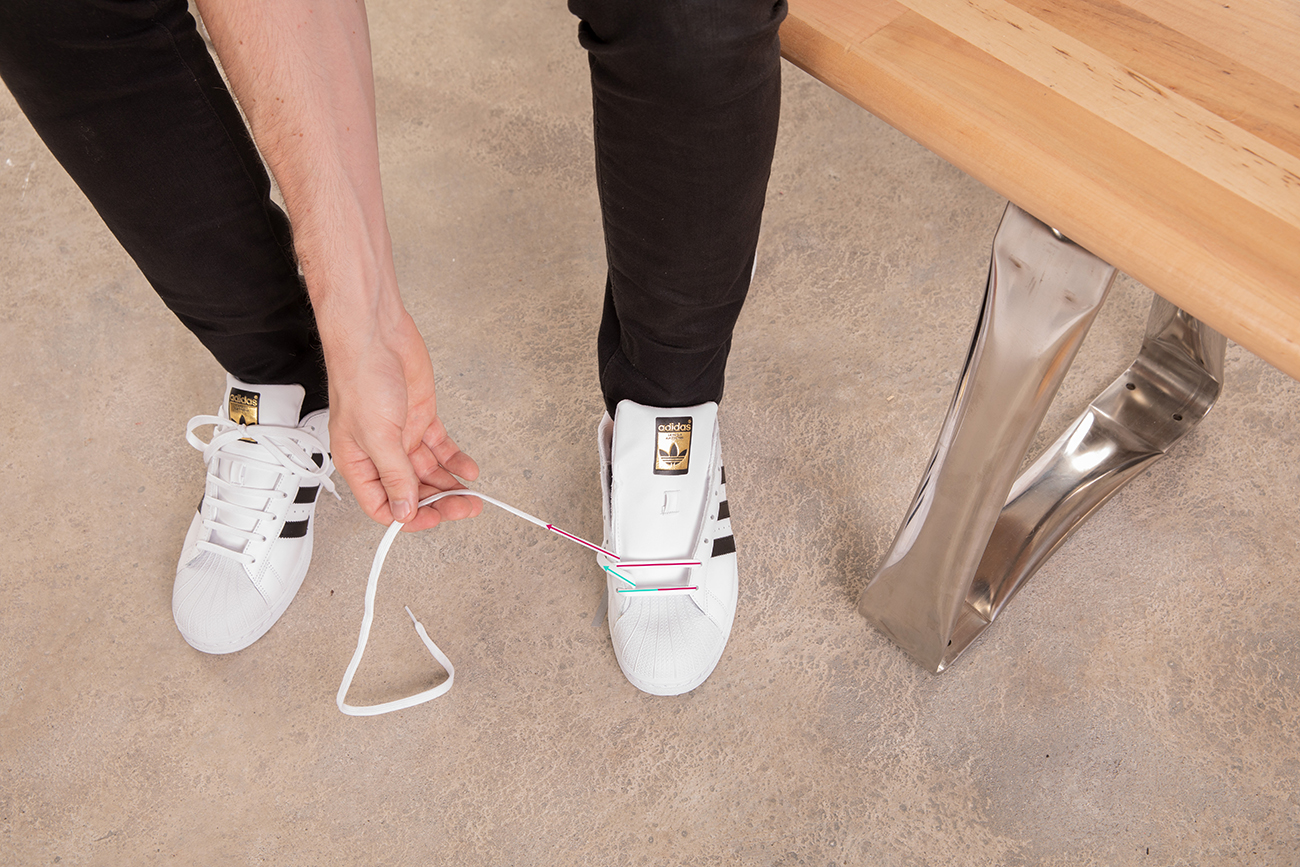
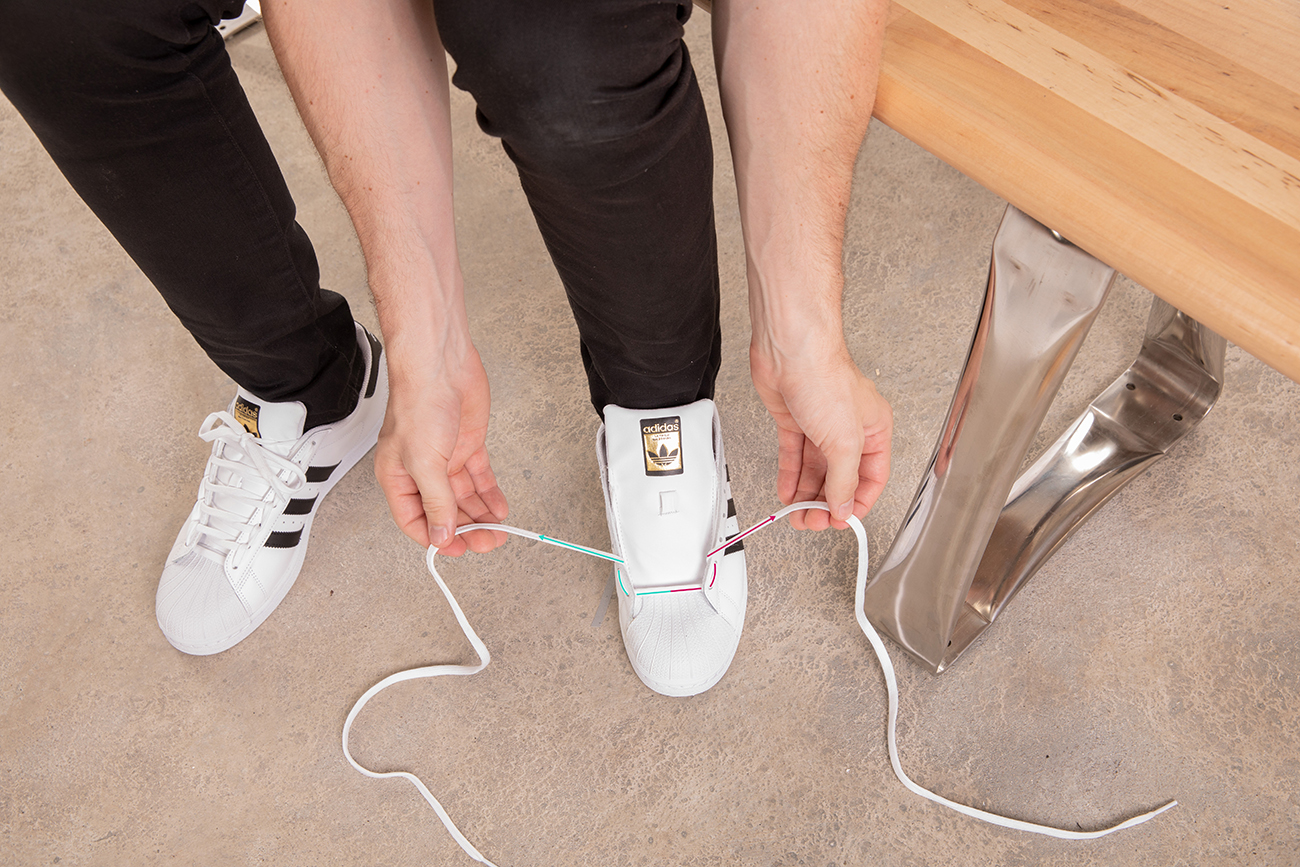
Straight Lacing:
This style is also called “fashion lacing” or “street lacing” since it’s casual, clean and cool. The loose lacing style gives your foot room to breathe so you can put swagger in your step.
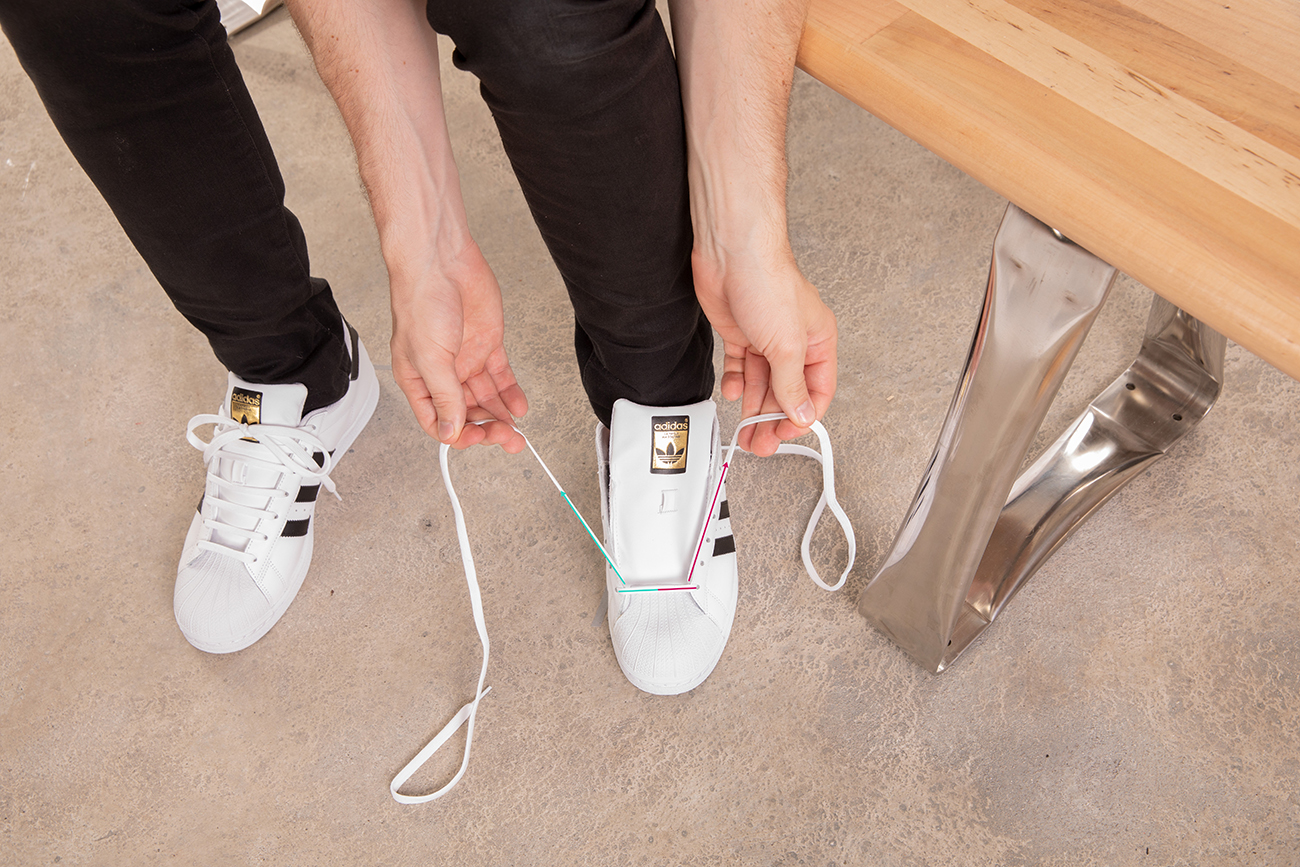
Step #1
Start with an equal amount of lace on each side of the bottom eyelet.
Step #2
Left lace goes straight up the inside of the shoe to the second eyelet, then straight across.
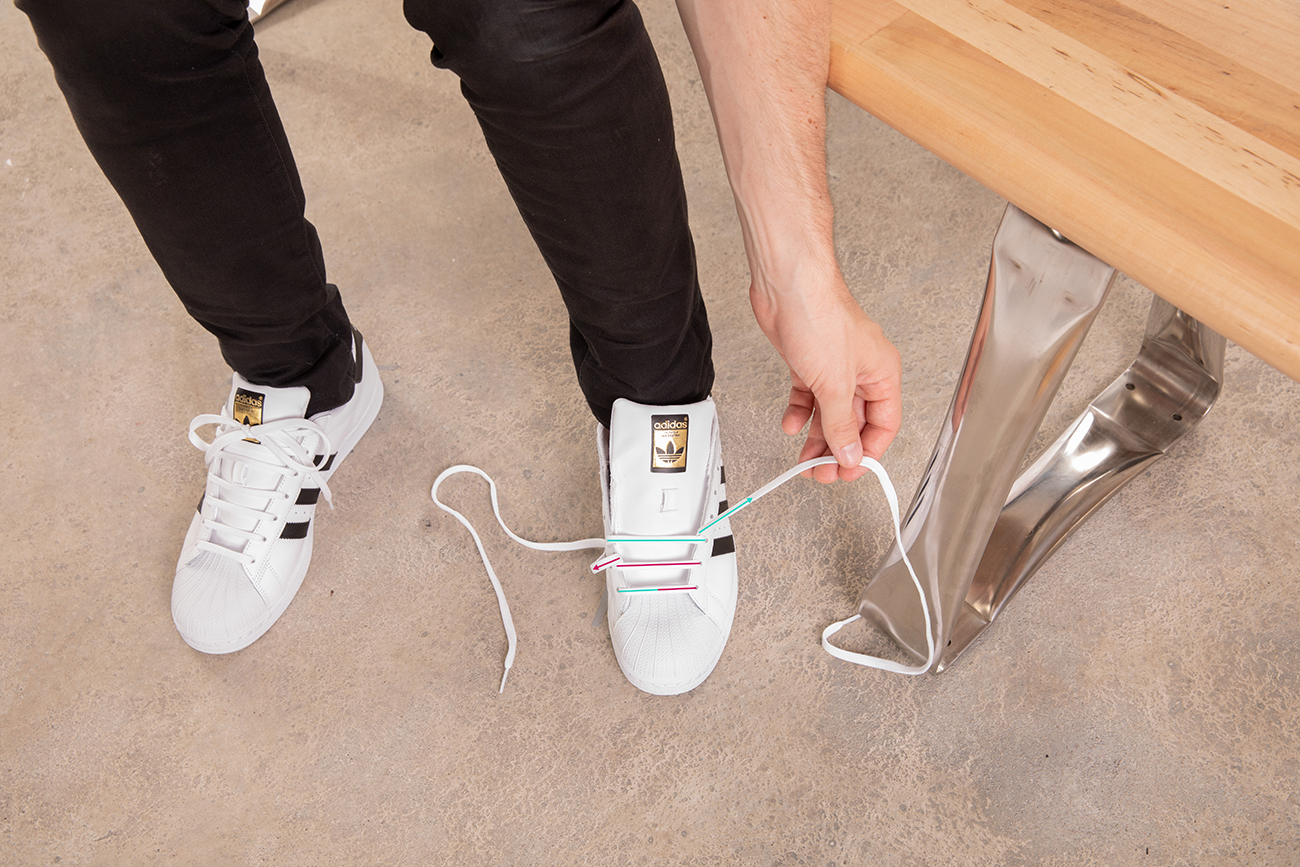
Step #3
Right lace goes straight up the inside of the shoe to the third eyelet, then straight across.
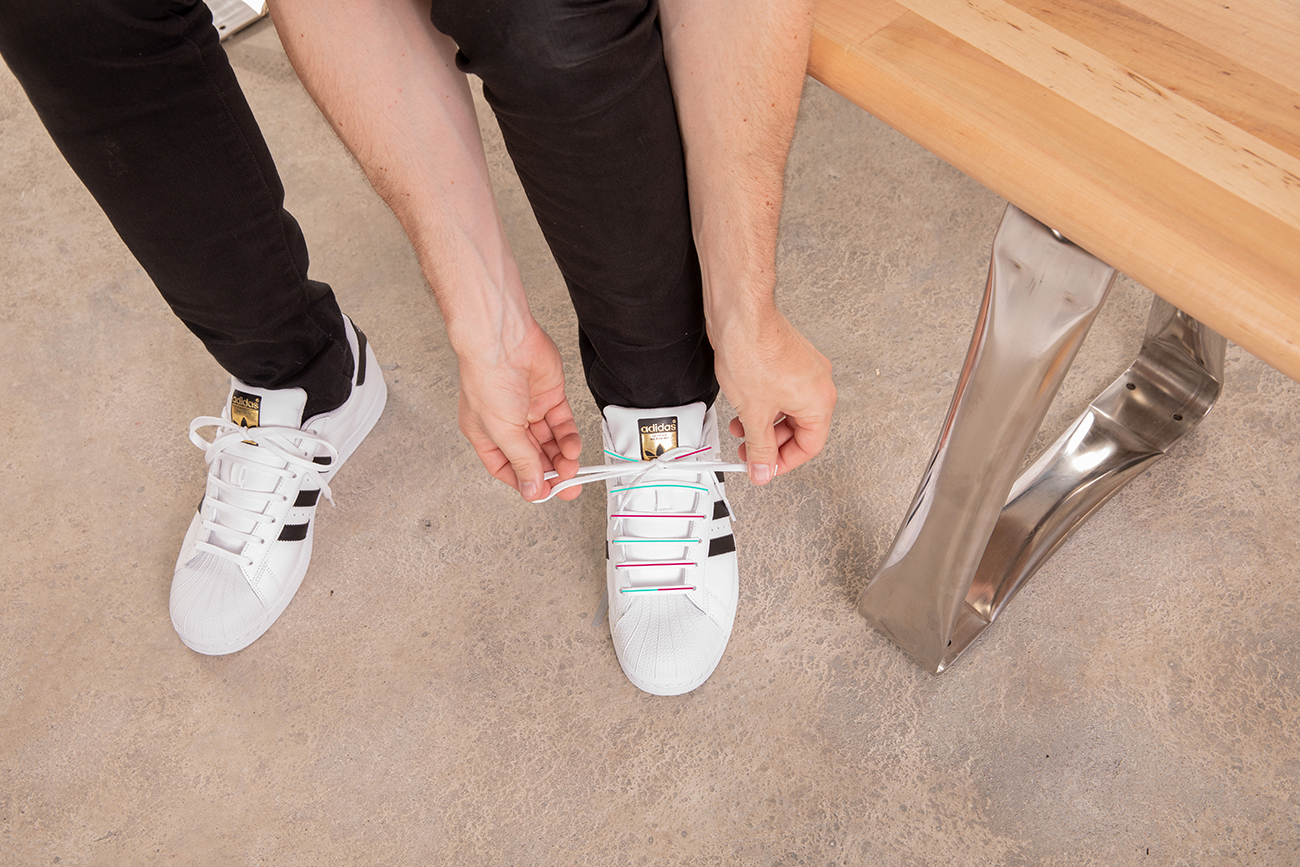
Step #4
Repeat Steps 2 and 3, alternating between the right and left laces skipping their respective eyelets inside the shoe before running straight across to the next eyelet. Continue this pattern until complete and finish with a regular knot.
Ladder Lacing:
This unmistakable design weaves laces together horizontally across the top of the shoe and vertically around each eyelet to create a “ladder.” The look always attracts attention for its unique and distinctive style, one originally created for military boots worn by ceremonial guards. As such, when shoes have lots of eyelets like Stan Smith’s, then it’s highly effective at keeping your shoes tied throughout the entire day.
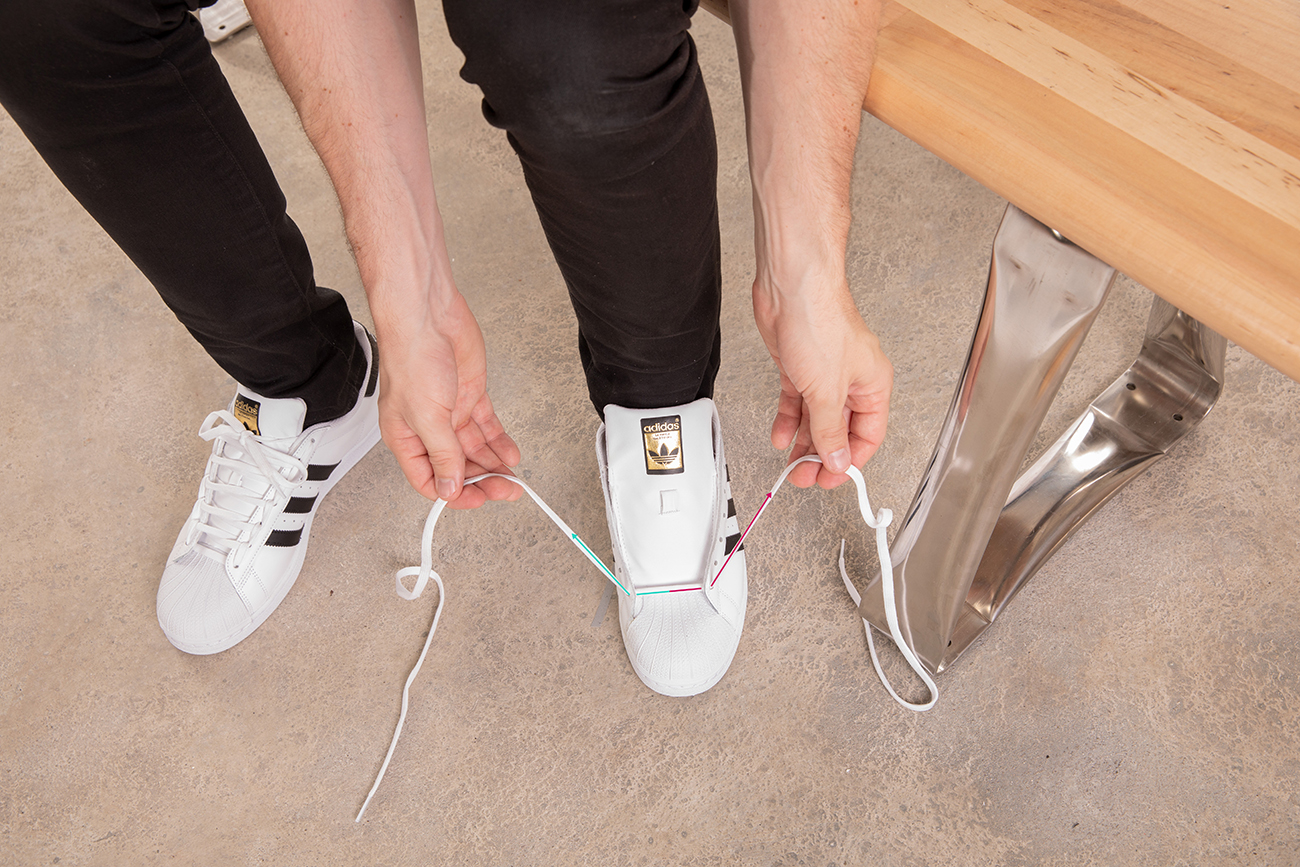
Step #1
Lace straight across through the bottom eyelets. Make sure you have an equal amount of lace remaining on the left and right sides.
Step #2
Run each lace into the second eyelet directly above by going straight up the outside of the shoe.
Step #3
Now, feed each lace straight across to the opposite side, then wrap it under the lace and the second eyelet (but not through the eyelet), before continuing up to the next eyelet directly above.
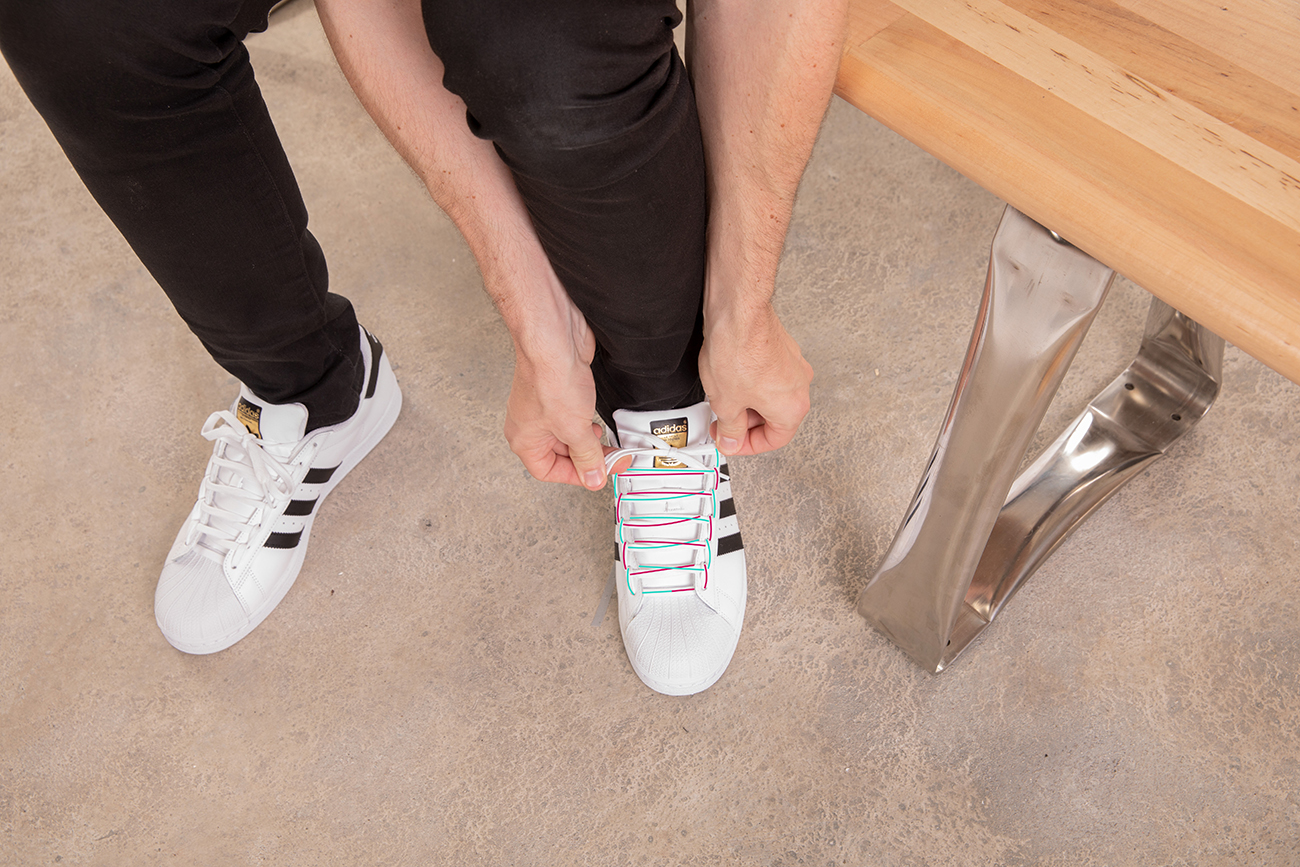
Step #4
Repeat the same process. Sending the laces straight across, under the adjacent lace and eyelet, before stringing it up to the next open eyelet until you’re finished.
Step #5
Take the laces back across and under a final time for a consistent look before tying a bow knot.
Spider Web Lacing:
This is the show stopper. The Spider Web is a detailed and intricate lacing technique to stand out on the streets and start turning heads. The impressive style weaves an elaborate web with laces going back and forth across the top of the shoe, so follow the steps closely. It’s as complex as it is cool.
Step #1
Begin by lacing straight across the second-from-the-bottom eyelets and make sure each end is even.
Step #2
Slip each end down the outside of the shoe to the first, bottom eyelet.
Step #3
Take each lace diagonally across the shoe, creating an “X” as the laces move into the third eyelets.
Step #4
Now, take each lace straight back down, wrapping under the lace and eyelet directly below (not through the eyelet). Then take the laces up, diagonally crossing into the next open eyelet. In this case, it should be the fourth.
Step #5
Repeat Step 4 until you’ve reached the top eyelets and tied your preferred knot.
Note: This style looks best when shoes have many eyelets to create a more intricate weave and when the sides of the shoe are further apart, displaying more of the shoelace web.
Bow Tie Lacing:
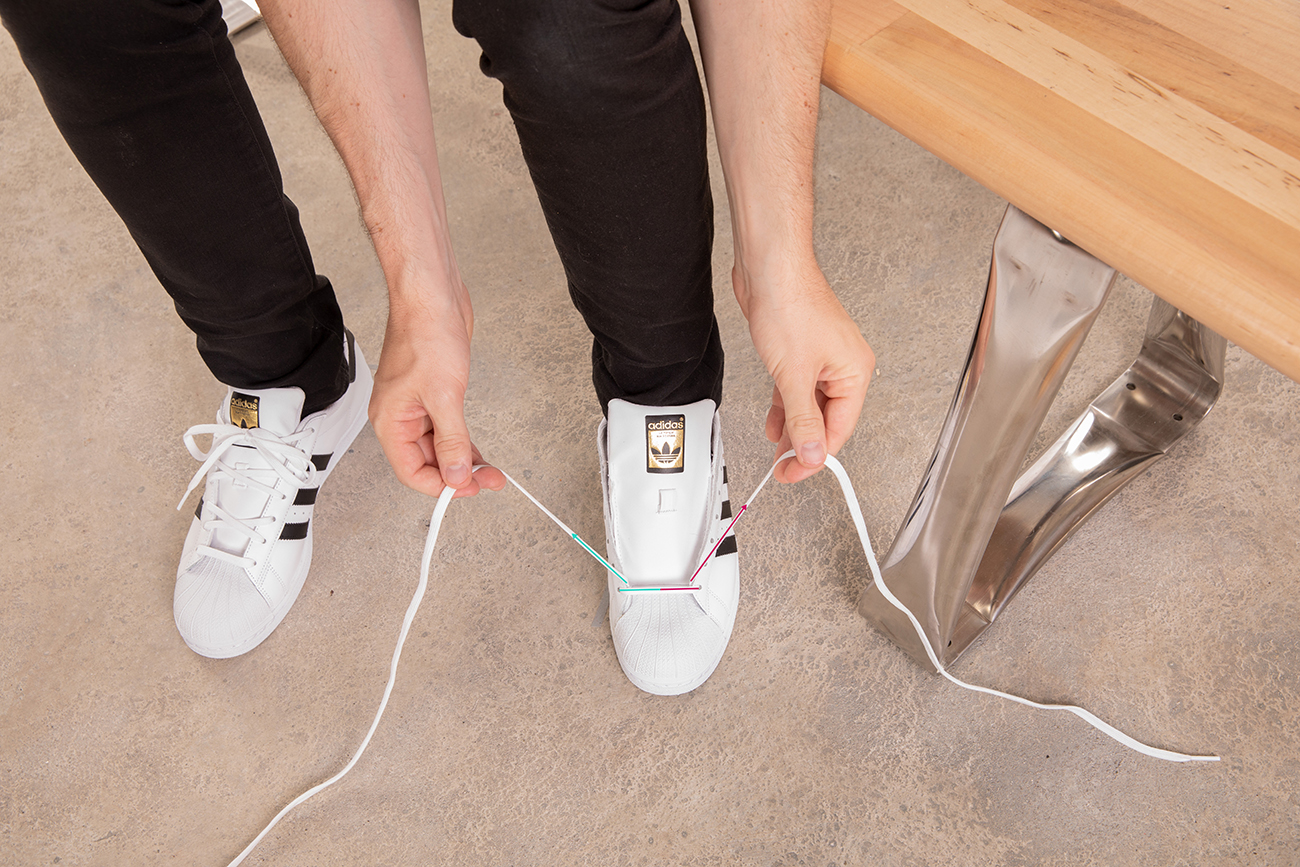
If you want to rock a lacing style that’s more minimalistic, then Bow Tie lacing is the way to go. It hides the laces by running them up the inside of the shoe vertically before crossing them over on the outside to form a simple “bow-ties.” Creating a loose fit that’s comfortable, casual and stylish. 100%.
Note:The method changes depending on the number of eyelets your shoes have and you might want shorter shoelaces because Bow Tie lacing doesn’t require much.
Step 1 - Even Number of Eyelets
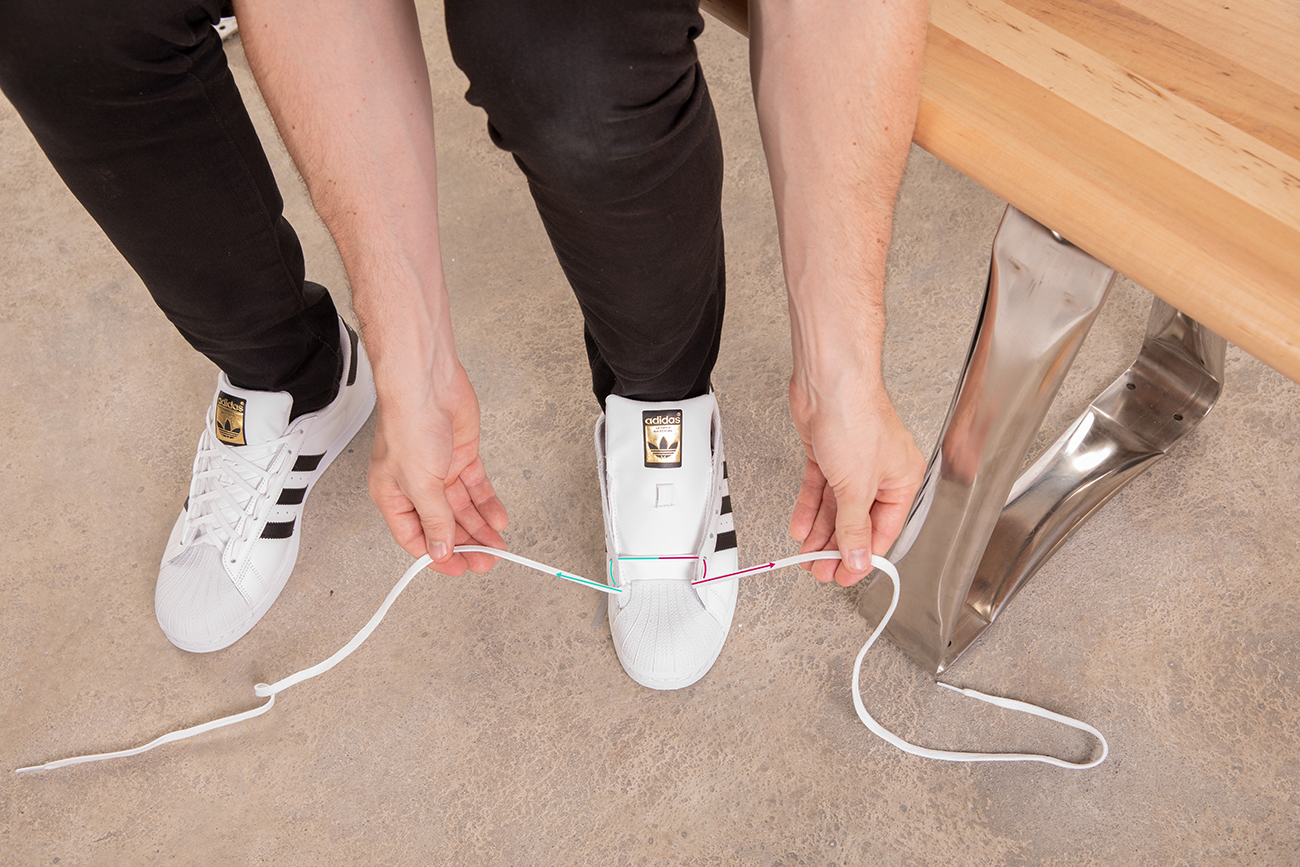
Take the lace straight across and through the bottom eyelets on the outside of the shoe.
Step 1 – Odd Number of Eyelets
Take the lace straight across and through the bottom eyelets on the outside of the shoe.
Step 2 – Even Number of Eyelets
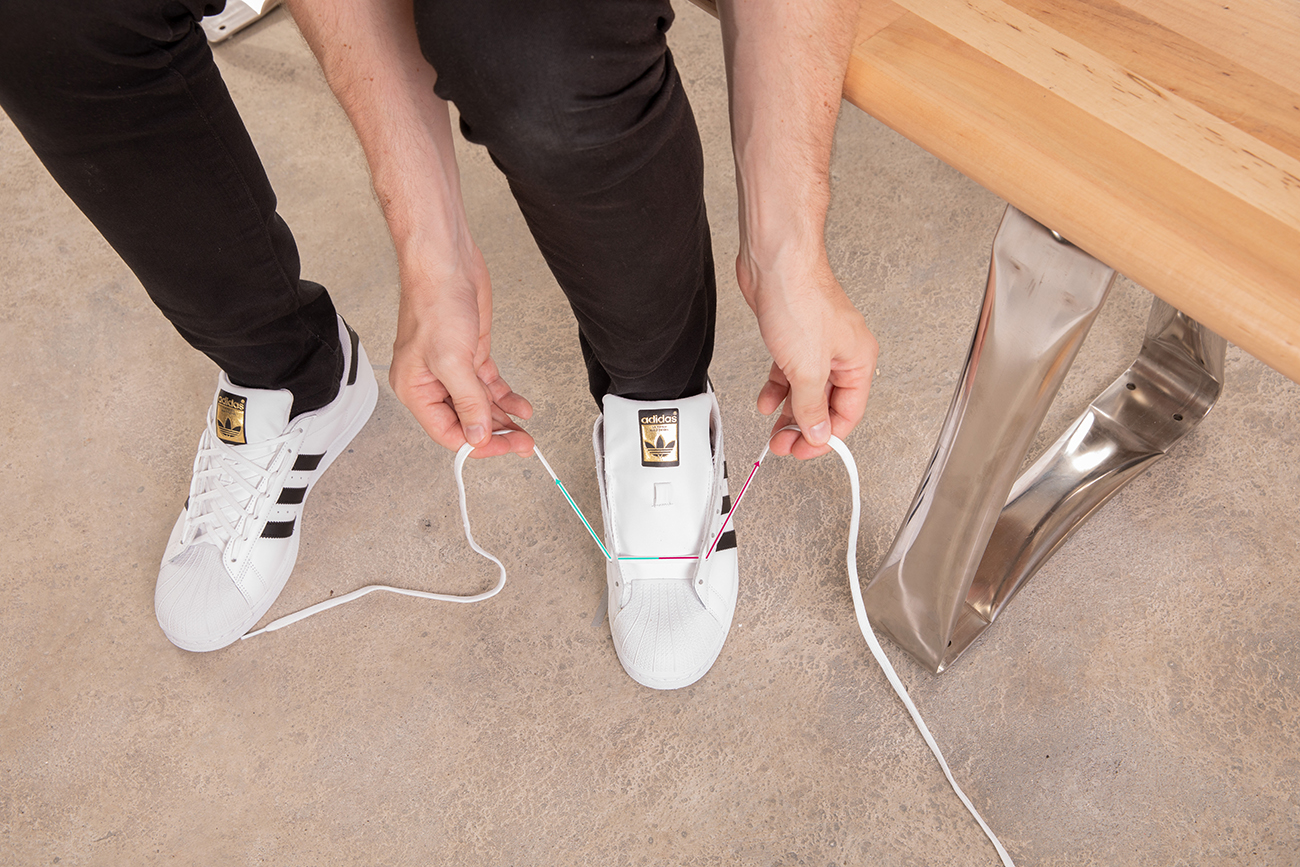
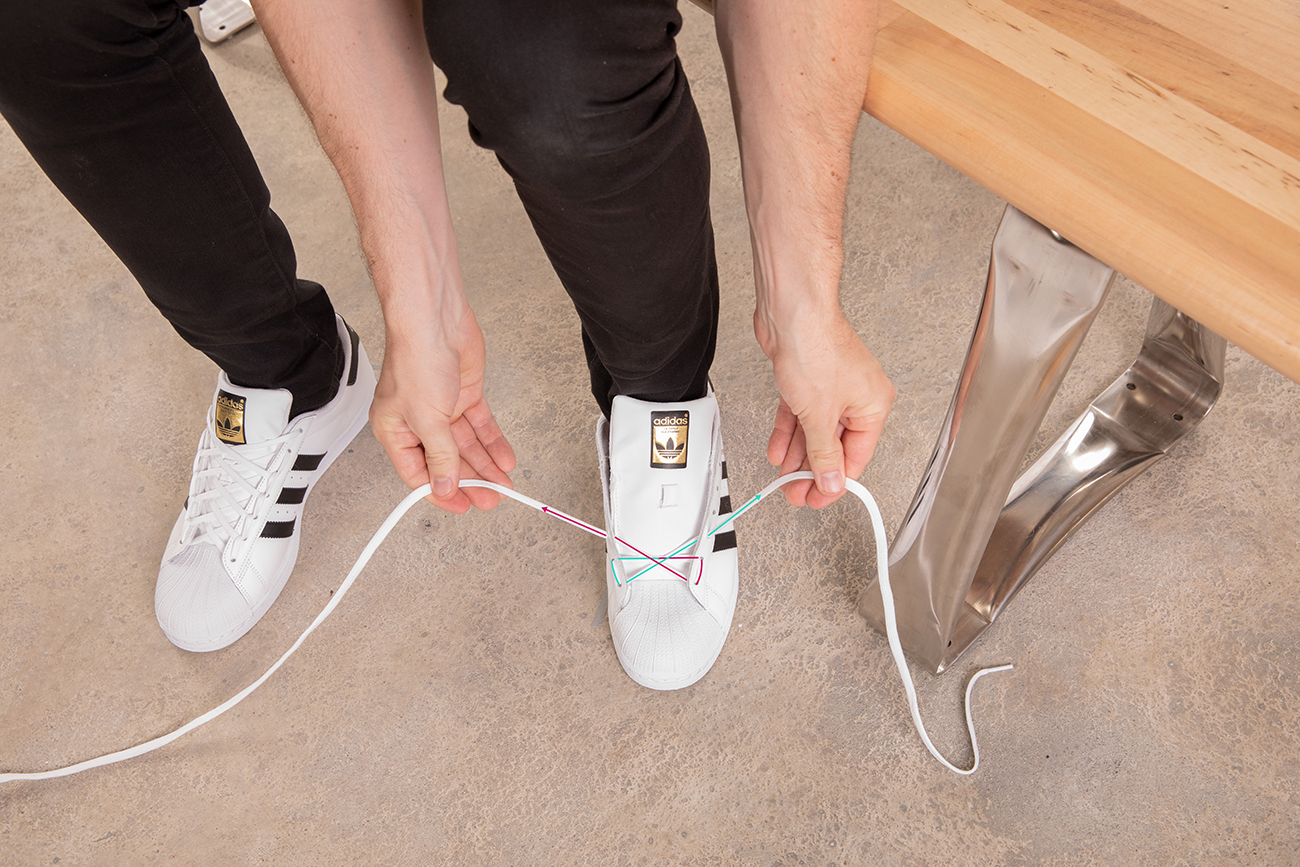
Slide the laces up to the second eyelet on the inside of the shoe, then across diagonally into the third eyelets. Making an “X” shape.
Step 2 – Odd Number of Eyelets
Thread the right and left laces across each other diagonally into the second eyelets. Creating an “X” on the top of the shoe.
Step 3
String the laces through the inside of the shoe to the open eyelet directly above, before crossing the laces diagonally on the outside of the shoe into the next available eyelet.
Step 4
Continue the pattern until you’ve reached the top of the shoe. Tie knot.
Loop-Back Lacing:
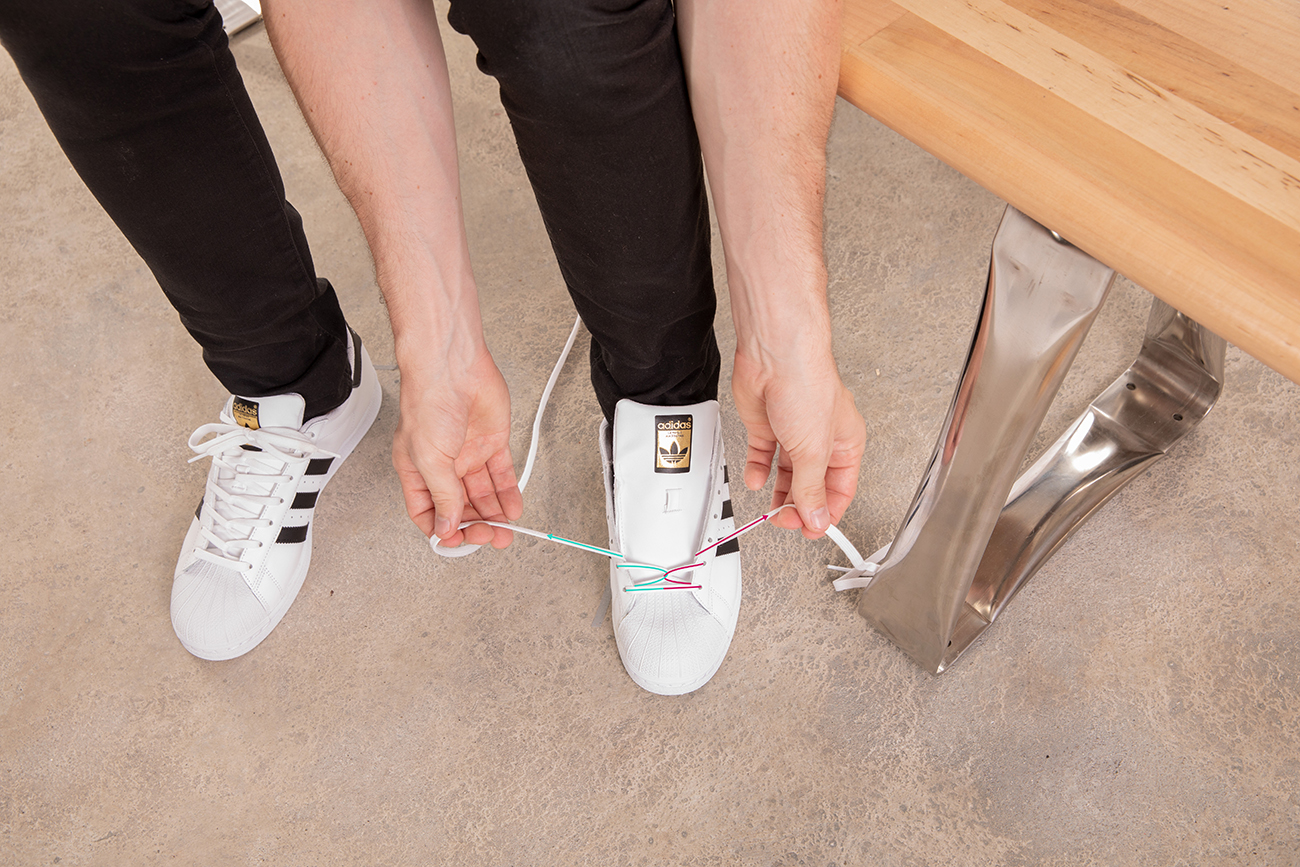
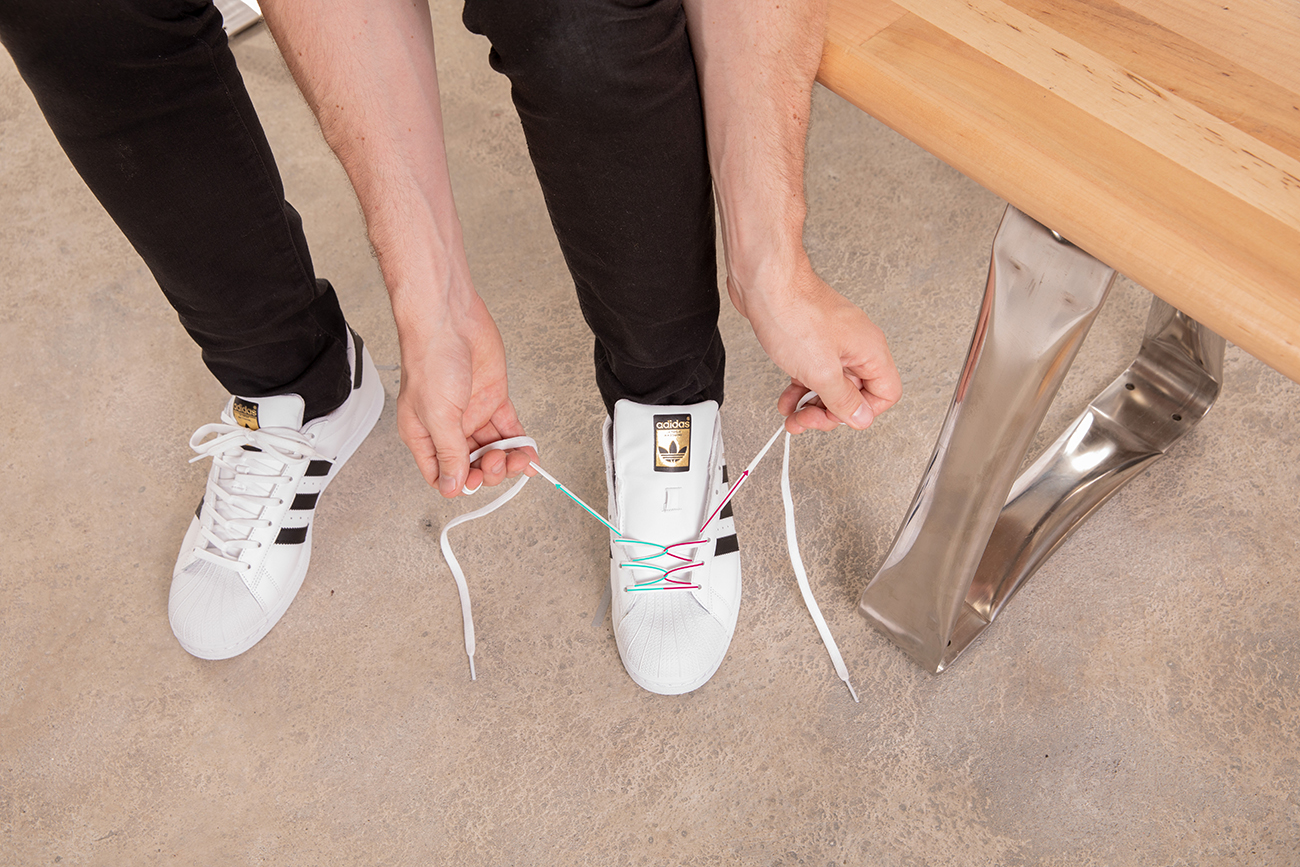
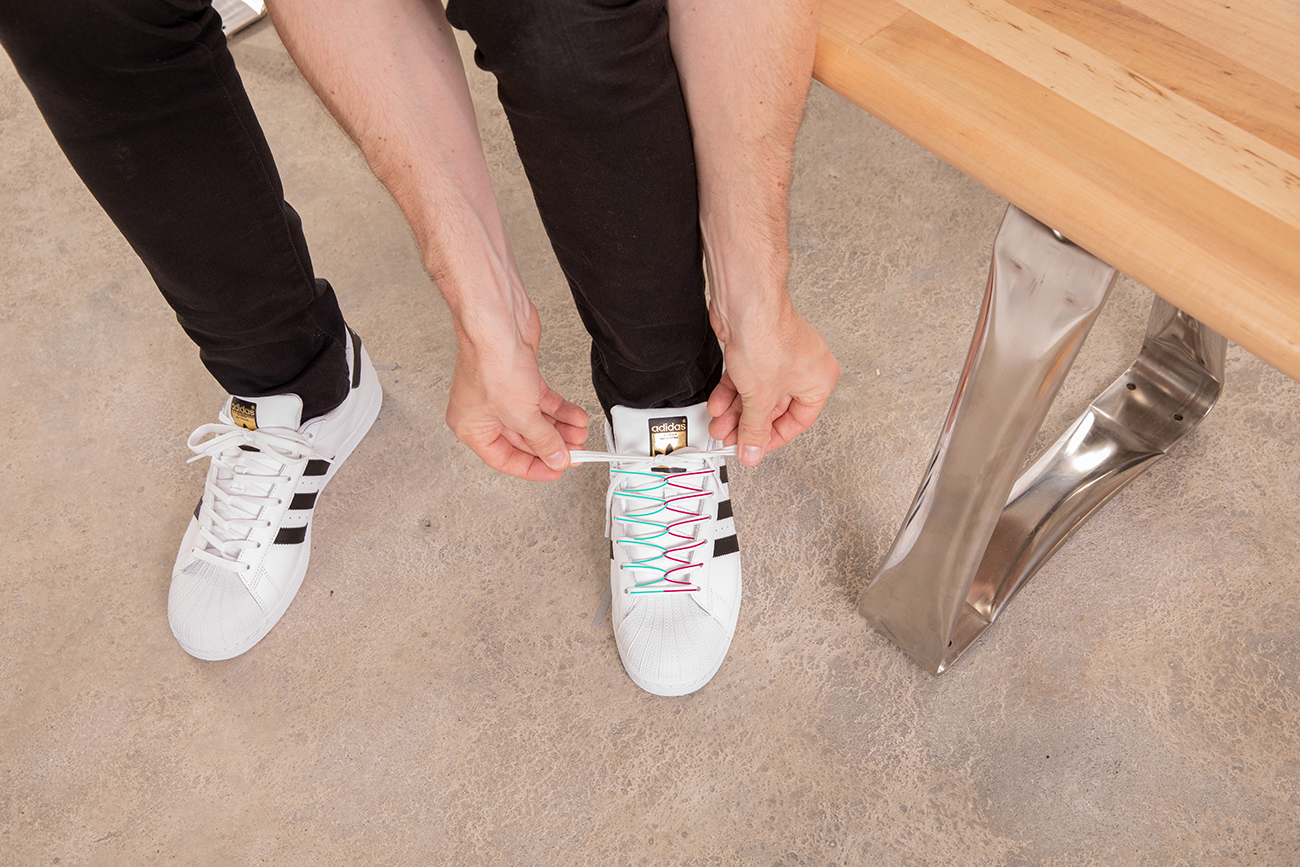
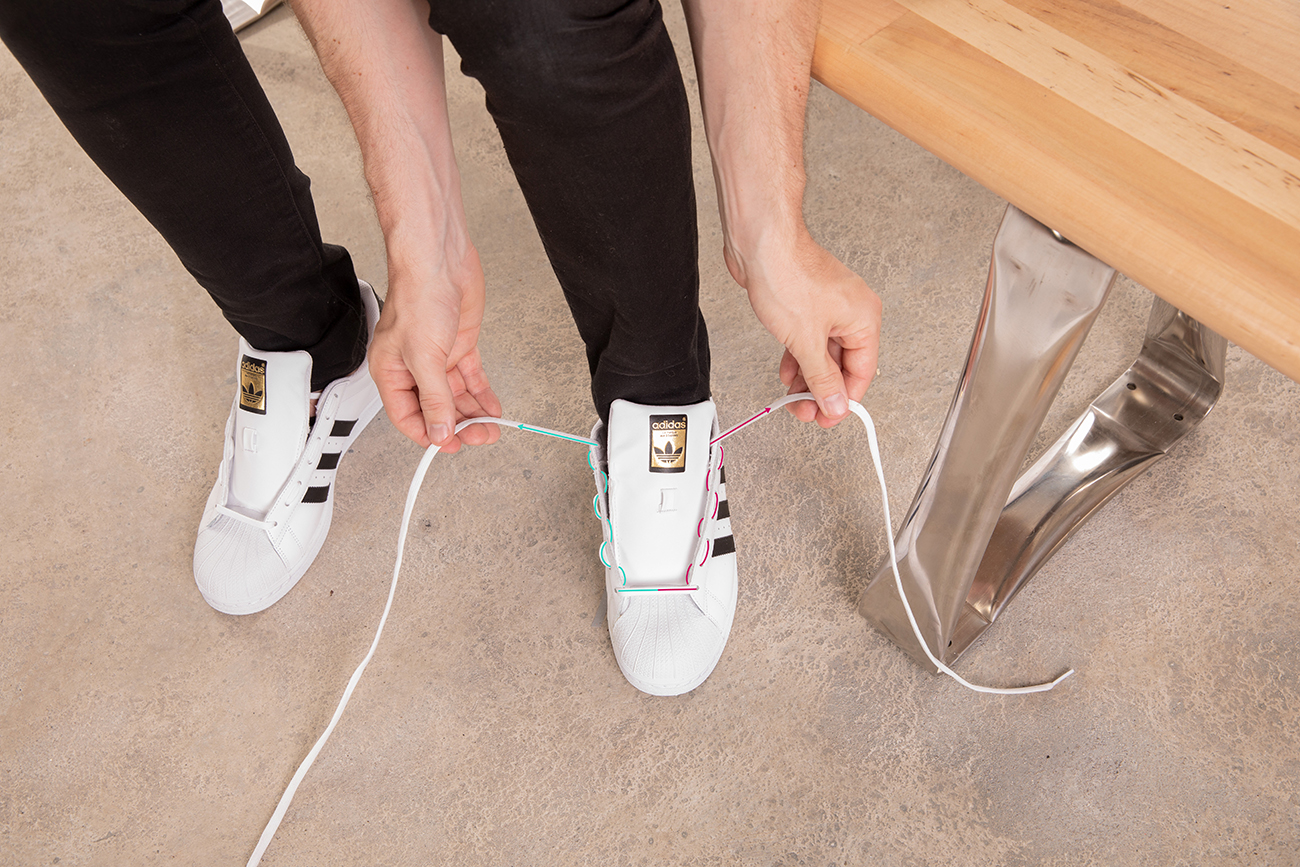
When you’re rocking Loop-Back Lacing, fancy footwork takes on a whole new meaning. This decorative style loops the laces together straight down the middle of the shoe. It’s the opposite approach of traditional crisscross lacing patterns. To really make the style pop, try thick, round and colorful laces that contrast with the color of the shoe (for example: white laces on black shoes).
Step #1
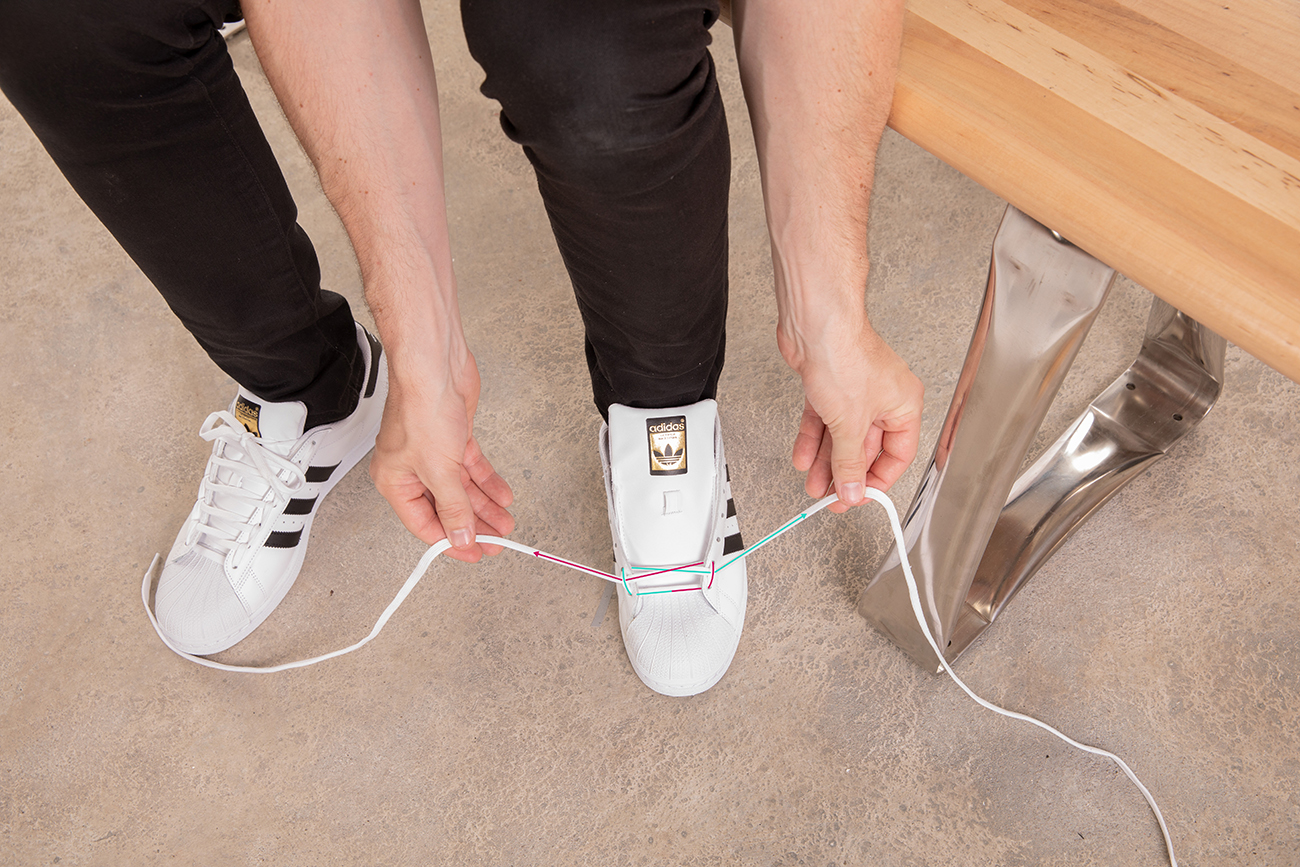
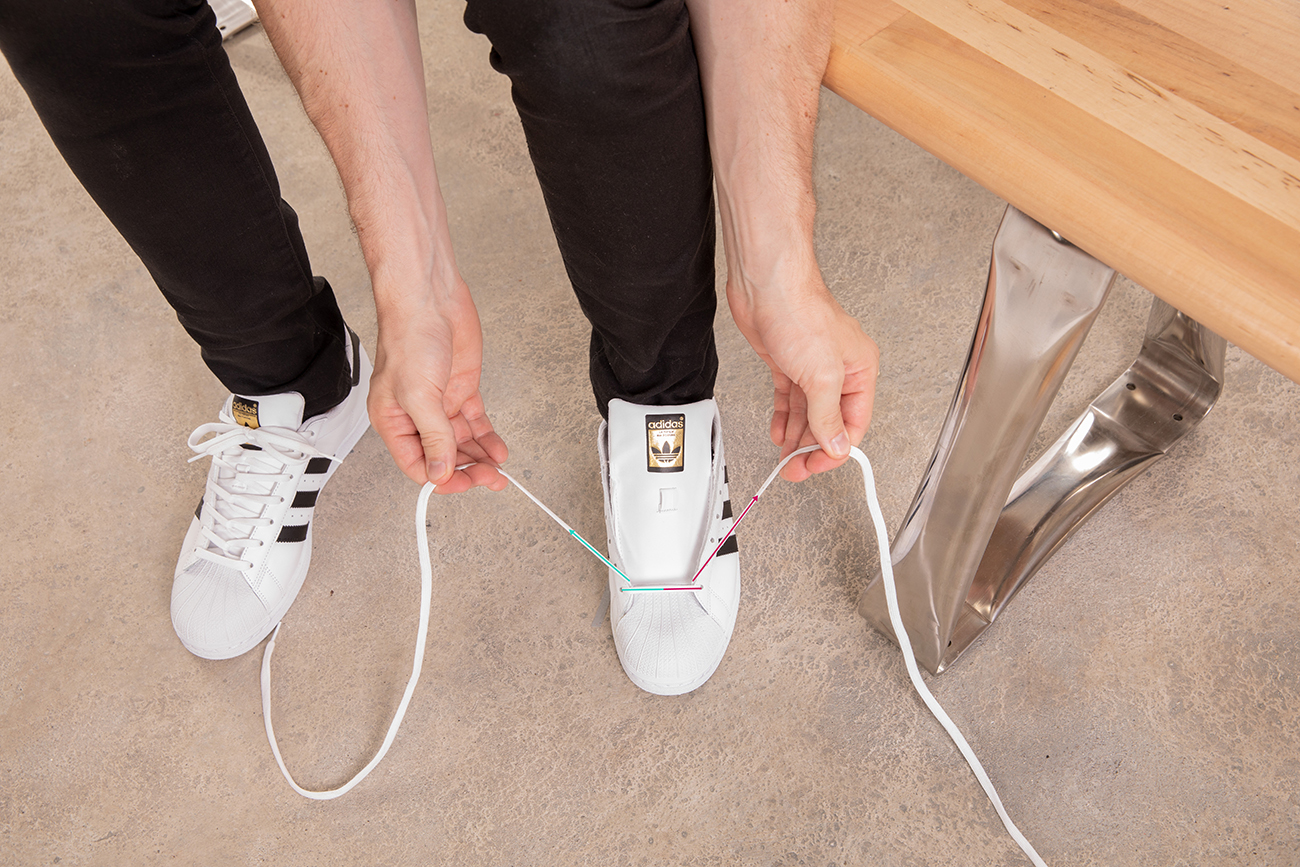
First thing first, take the lace directly across the bottom eyelets – leaving the left and right laces equal in length.
Step #2
Now you’re going to take each lace diagonally across the shoe, wrap them around each other in the middle and string them back through the inside of the next open eyelet. Note: Laces should loop in the middle, and the left and right laces should always return to the same side.
Step #3
Repeat Step 2 for each eyelet by continuing to loop the left and right laces together in the middle of the shoe and back through the next open eyelet.
Step #4
Once the laces have reached the top of the shoe, tie your preferred knot.
Missing Laces:
Show your true creator spirit with this imaginative and original lacing technique. What makes this one so different? The laces are hidden, taking the shortest path through the eyelets along the inside of the shoe and making it appear as if your shoes are missing laces. The novelty style creates an incredibly loose fit that’s perfect for kicking it with your crew. Just don’t plan on busting a move on the dance floor.
Step #1
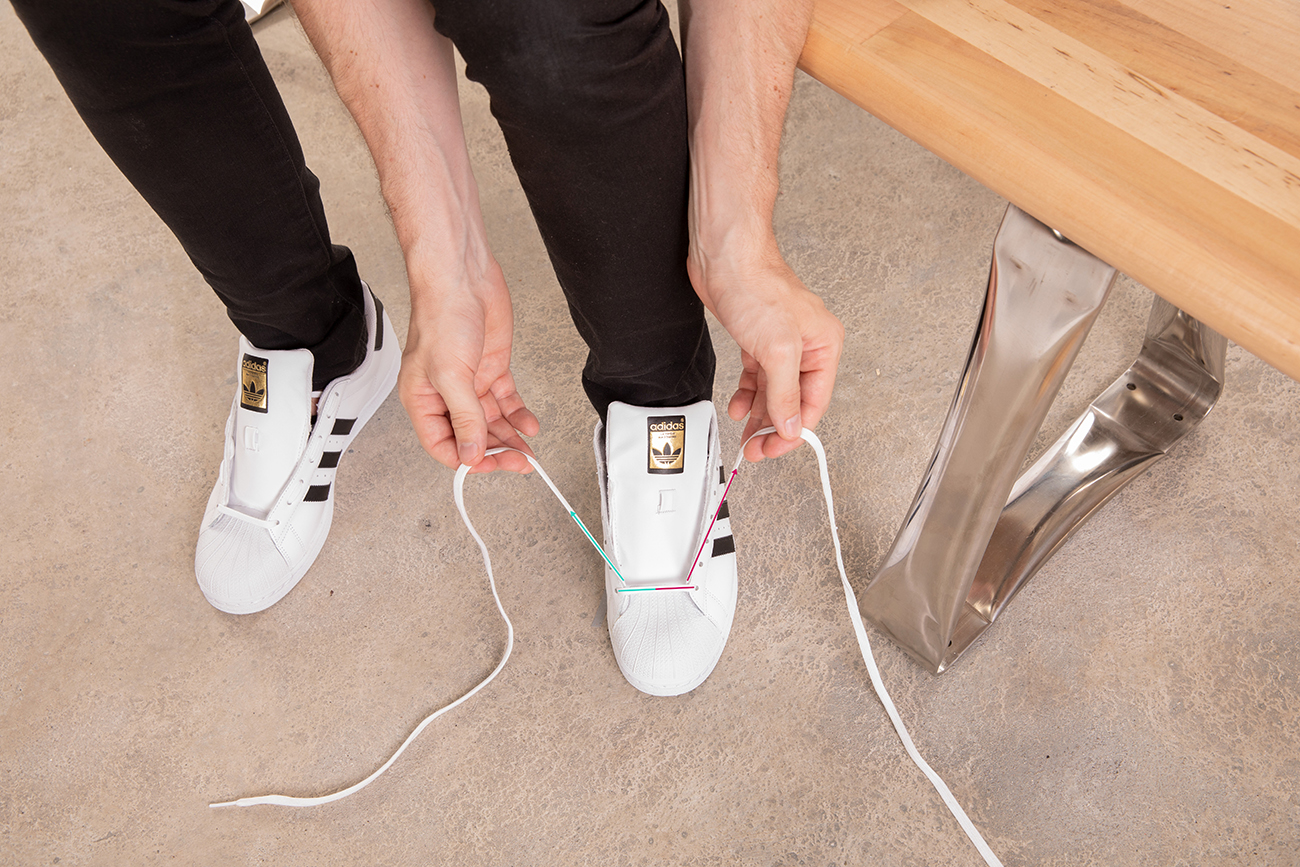
Begin by threading the lace straight across the bottom eyelets. Leave an equal amount of lace on the left and right sides.
Step #2
Take each lace straight up into the eyelet above and continue stringing the laces through the eyelet above, alternating in and out but never crossing over the middle.
Step #3
Once you reach the top of the shoe, tie it in a bow and tuck the bow behind the tongue. Note: Shorter shoelaces are recommended or you’ll need to tuck the extra lace material inside the shoe.


